Top 10 Candle Tips and Tricks for Making Candles
When you're starting your journey to candle-making, you come in with a mindset that it's easy to do. After all, it's just wax, a wick, and the mold, right? And then you start doing your research so now you're thinking, “it's not as easy as I thought it would be” after all.
You're probably here because you're in the “research phase” of your new adventure or you've already created a batch or two but it didn't come out as you wanted it to. If you're looking for candle-making tips, you've come to the right place!
Candle making is a form of art. You can’t rush it and you rarely get it perfectly on the first try. It can be different for everyone, depending on how specific you are with your desired output and that's alright. There’s no “one way” to do it, and there are several candle tricks you can use for when you will eventually make a few tweaks to your kit formulas to fit your preference. Remember, candles can be personal. Every candle maker has his or her style or preference, depending on how you want the candle and your candle lights to turn out. You can always begin your journey with a “starter kit” that has specific instructions and pre-measured materials, and then you can adjust it as you learn more. Here are 10 Candle Tips and Tricks for every candle maker.
It’s okay to get it wrong
Many beginner candle makers get frustrated or discouraged when their first batch doesn’t turn out as expected. You may think you’re not made for this or “what a waste” of wax melted and materials but don’t worry! It's okay to mess up the first few tries because that’s how you truly learn and understand the nature of the ingredients you are using. Trust the process and you will enjoy discovering your new craft.
The best thing about candles is you can always re-melt your wax melts and “reformulate” it by adding more of your raw materials and then experiment on how you can improve your candle. There are so many ways to reuse your ”failed batch” so as not to let it go to waste. Here's one of the many “pro candle tips” we can share. You can use it as decor for your home or spice up your next batch of candles. How? Have you ever heard of mosaic candles or candle crafts? Melt the wax, color the wax, and do something creative with the wax!
Practice and Patience
As mentioned earlier, it takes time, effort, and the right tools and materials to create your ideal candle. Whether you're making coconut wax candles or scented candles, you have to practice and reinvent your formula as you please so don’t get discouraged so quickly. Be patient and keep practicing until you get the quality that you want.
Takedown notes
Candle-making is a journey and you want to document your experiences, especially when you've started creating your formula. Your candle journal will help you keep track of your progress, what works and what doesn’t work for you, the wax melts or formula you used per batch, as well as the results you get for each batch and combination as you test burn to see how well your candle lights. A few details to take note of are the dates and time, type and percentage of wax you used, type and percentage of fragrance oils, wick and glass size, the mold you used, and the temperature of when you added these extra materials.
Know your wax
There are over 60 kinds of wax you can use to make your candles like soy wax or coconut wax, which means that there are hundreds of possible combinations you can use. Each of them has its advantages so if you don't know where to start, you can check out our blogs section where we discussed Everything You Need to Know About Coconut Wax and a few of your other options – this can be your starting point and then expand from there.
Know your wicks
Different wicks can react differently to different wax melts. The wick can affect the life of your candle, your candle light, the safety of the candle, and can give you different burns so you need to match the wick to the type of candle you’re making. Some things to consider when you’re choosing a wick are the right wax, the candle’s size, the scent you're using, and the color of the candle. You can find charts or “cheat sheets” of wick options available online. This will guide you on your wick selection process or you can just make one for yourself.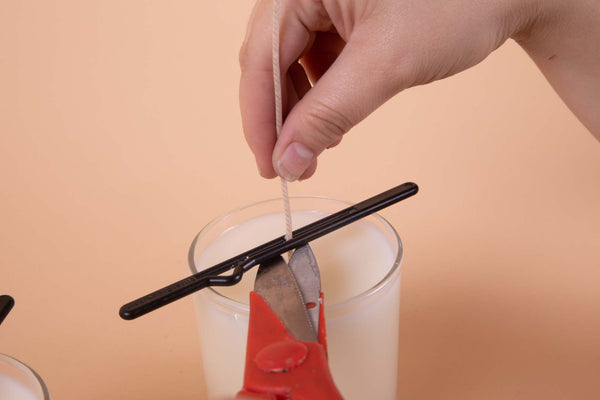
Know your fragrances
Like understanding the dynamics between your wick and wax melts, another component to factor in would be your fragrances. We all love scented candles and we all want our scented candles to be long-lasting but there are several ways to add scent to your candles. We have a blog on which is the best fragrance to use for your candles and other crafts and it’s the right place to start learning about fragrances but, aside from understanding fragrance notes and how you can create your blend of scents, you have to know how each type of oil or raw material will affect your candle. For example, some oils do not do well when added while the wax melt is too hot, some may not mix well with coconut wax, while some can clog your wick leaving you with weird-looking candle lights. This is why some scented candles only smell nice but don't produce nice candle lights.
Less can be more
We get it! Sometimes you want to get crafty and make your candles extra pretty, you might even want to add so many decorative elements like flowers or stones or maybe a concoction of fragrances that will create a scented candle that makes your entire home smell amazing but just relax! The best candle tips we can tell you are not to go over the top. It's not always the way to go and sometimes, a simple minimalist candle is the best thing ever! Besides, all those added elements can be a fire hazard so be careful of the elements you choose to add.
Poke your candles
This is one of the many candle tricks that might sound weird but if you want to avoid under burning and ensure beautiful candle lights, you should make sure that there are no “air pockets” in your candle while you're making them. When making a pillar or container candle, especially for those with a wider diameter and deeper height, take a skewer and poke holes before pouring your next layer. These are called relief holes which will get rid of air pockets that form in your candle as your wax cools down and shrinks. This helps the candle become more compact and lessens the risk of a tunneling and under burning candle.
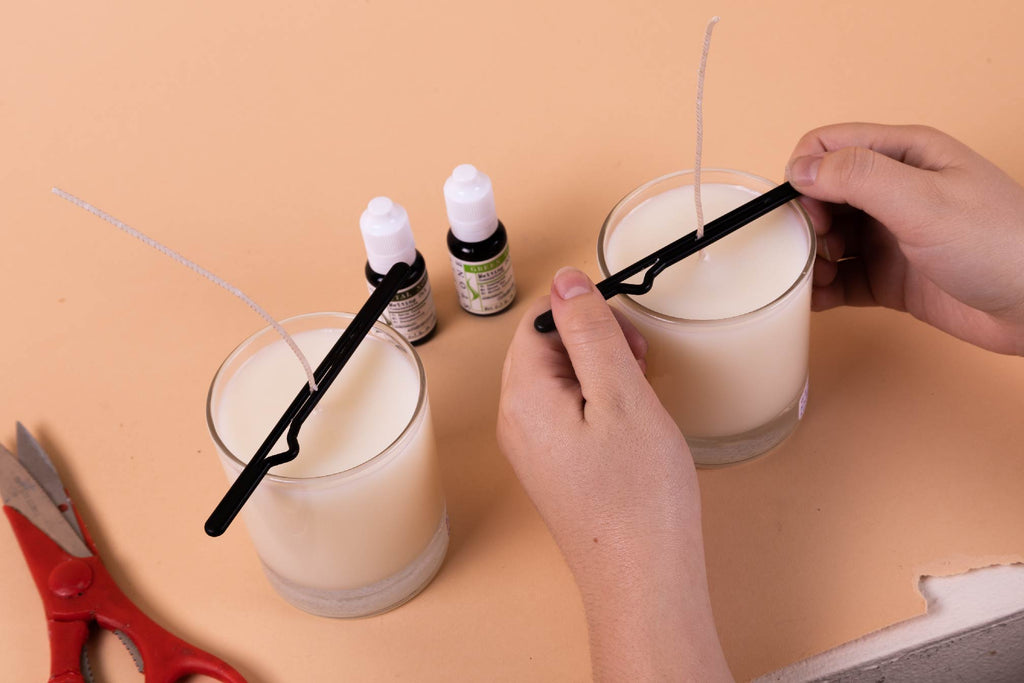
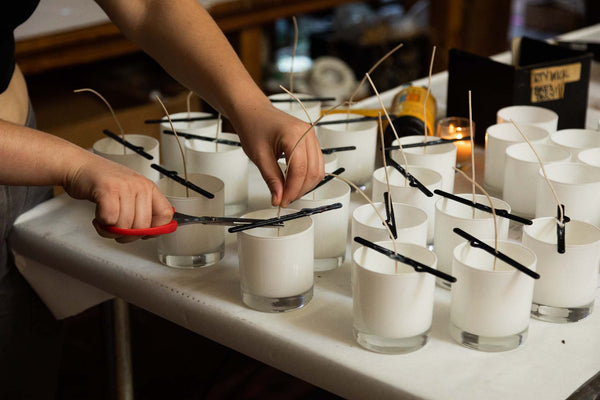
Anchor your wicks
A very common mistake for a beginner candle maker is not anchoring your wick. The metal tabs you can place at the end of your wick are only meant to keep the wick from being pulled out of the candle but that doesn’t guarantee it will stay in place. Anchor your wick at the top and the bottom of your mold. Here's one of the good candle tricks, use putty or sticky tack to keep it in place and avoid leaks.
Blow dryers can be your friend
You can add this to your list of candle tips! There are times when the surface of your candle will come out with bubbles or uneven edges on top. You don’t have to scrape the top or redo the entire thing! Just turn on your blow dryer on the lowest setting and heat the top of your candle in circular motions. Let the heat of your blow dryer melt the top layer of your candle, let it cool, and viola! A blow dryer can easily smoothen the surface of your candle and it’ll come out as smooth as ice!
Do you have any other candle tips and candle tricks for beginner candle makers? We'd love to hear your thoughts! Let us know in the comments section and we can all help our fellow candle enthusiasts with their candle-making journey!